
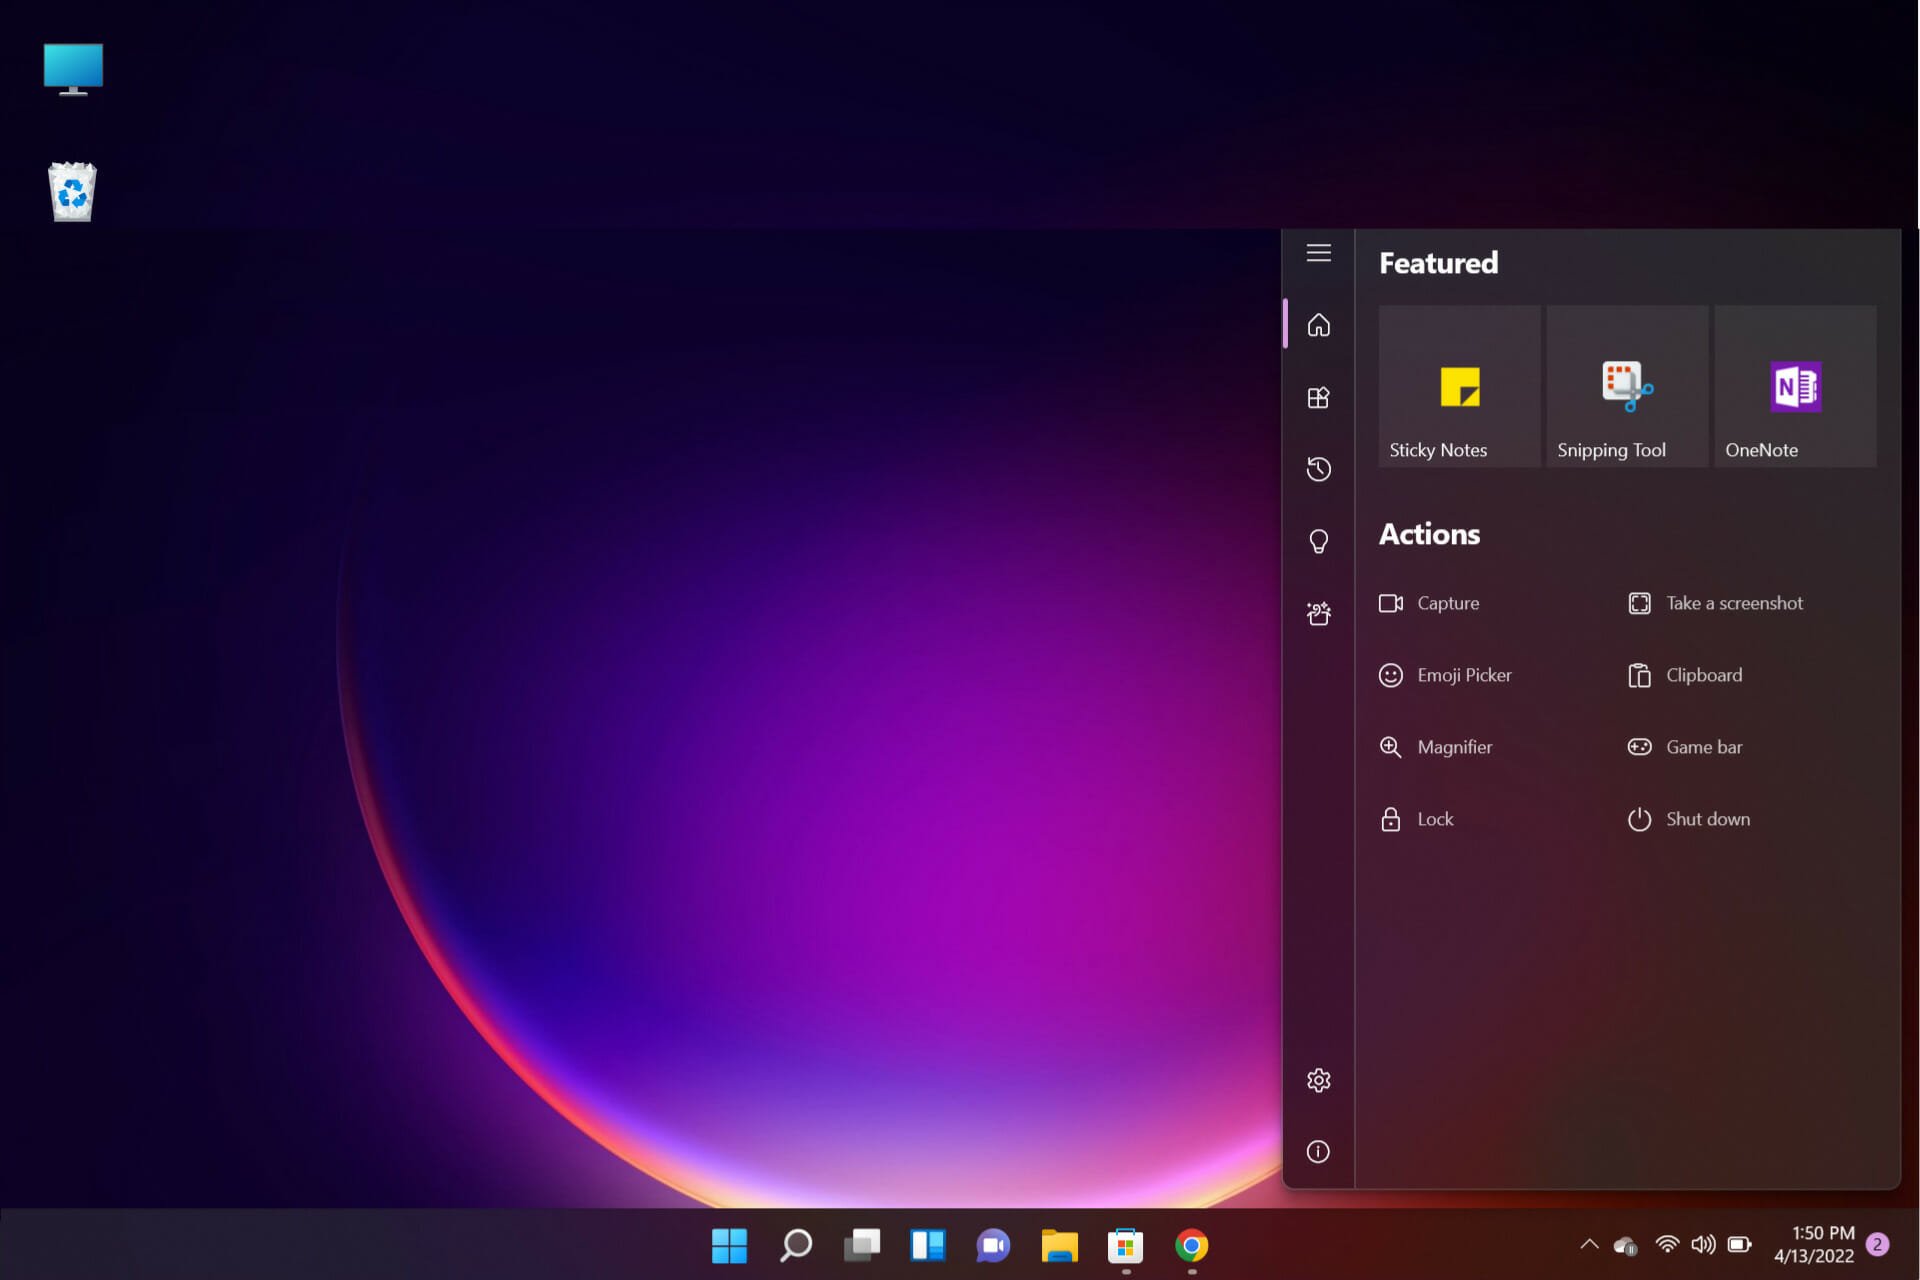
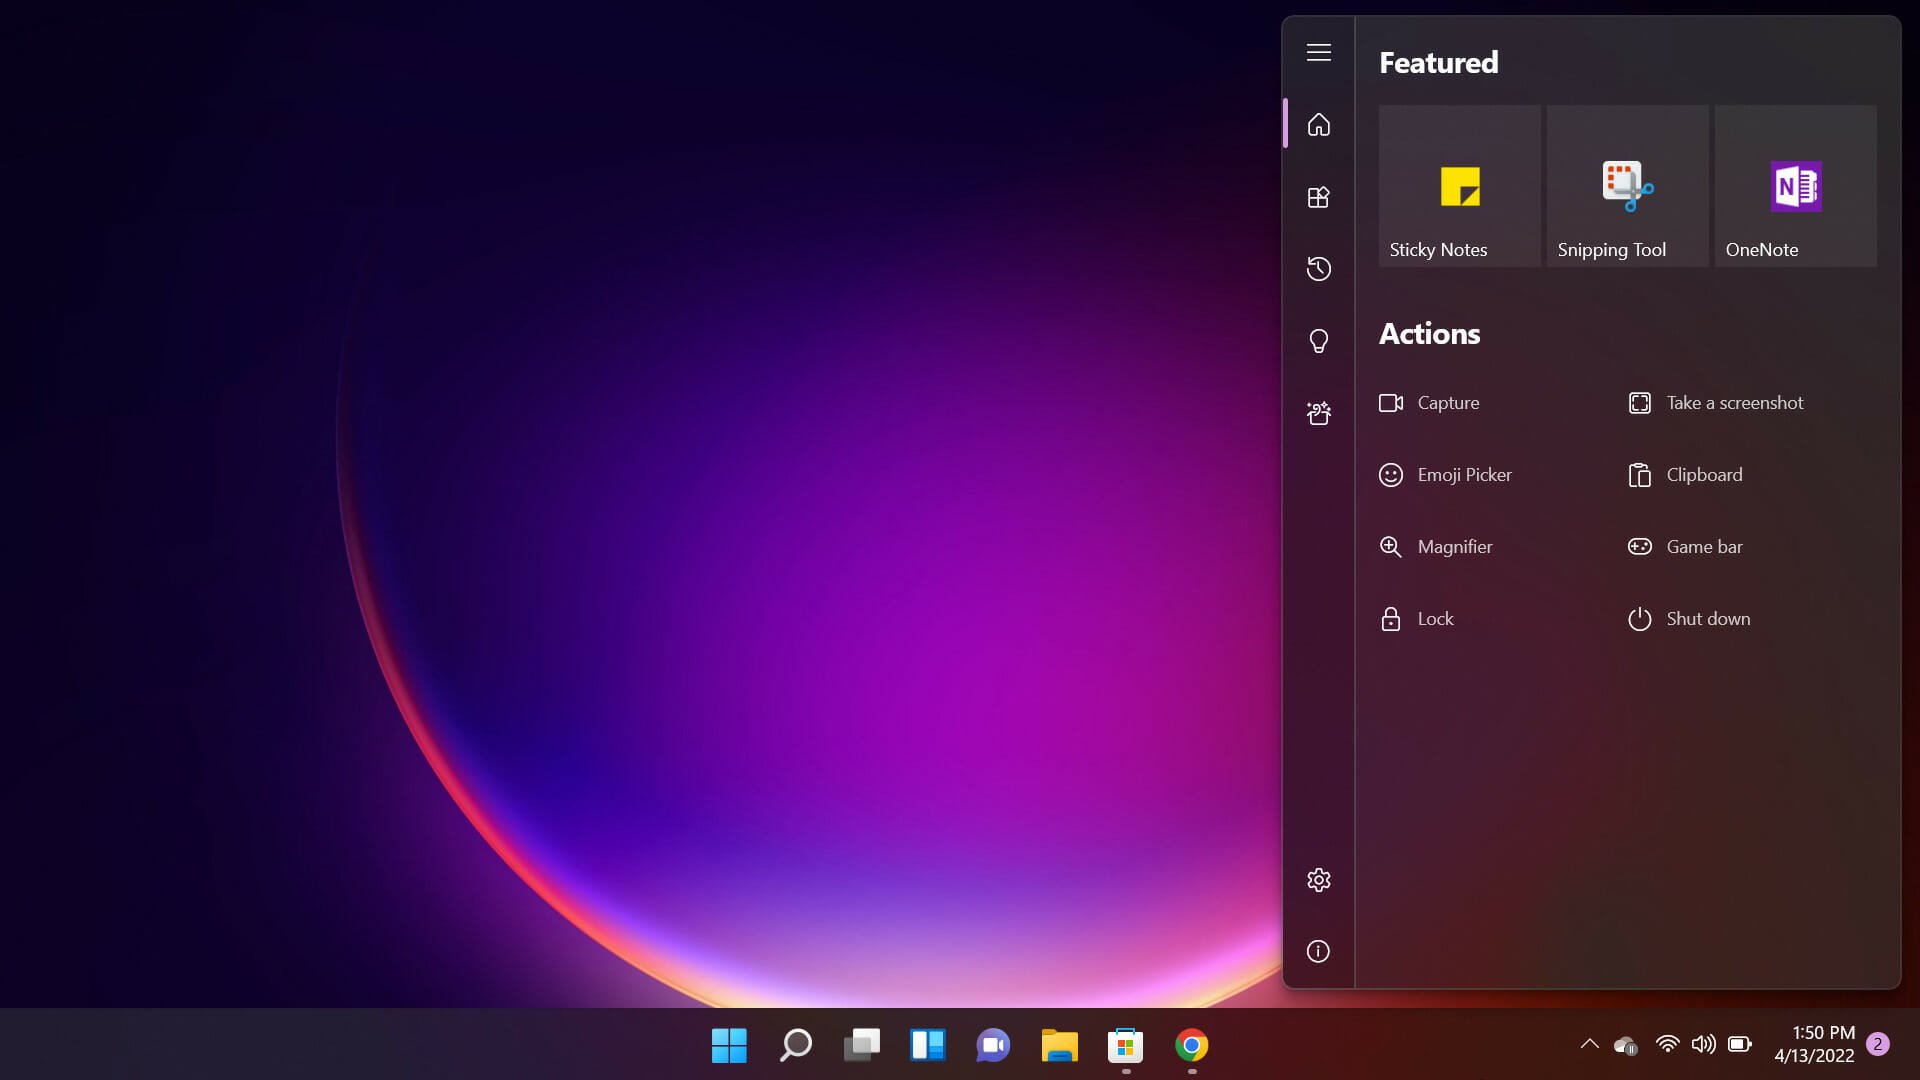
- The Windows 11 Ink workspace is a work area where users can run Sticky Notes and Sketch Pad applications.
- By default, the application is hidden from the taskbar and this makes it difficult to access this useful tool quickly.
- We have all the solutions to enable the ink workspace and pin it to the corner of the taskbar.
XInstall by clicking the download file
Microsoft Windows Ink Workspace lets you write on your computer as you would on paper using features like whiteboards, sticky notes, and other note-taking apps.
As handy as the Windows 11 Ink workspace can be, sometimes it gets lost from the taskbar.
Unlike previous Windows versions that locked the feature behind compatible devices like the Surface Tablet and Surface Pen, this one doesn’t require you to invest in expensive hardware before using this great feature.
Windows 11 Ink Workspace allows users to add any application to the Quick Access Toolbar – pen-optimized or not. You can install a maximum of 4 applications in the workspace.
We need to specify that Ink Workspace does not come with your default Windows 11 installation unless you specify that you have a touch screen device during installation.
So, you need to download and install the app first. This is probably one of the main reasons for not finding it in the first place.
How do I get the Ink Workspace app for Windows 11?
- Opens Microsoft Store From the taskbar, search for ink workspace Click on the application from the results.

- Now, press Gets button to download and install it.
- Finally, tap Opens button to start it.
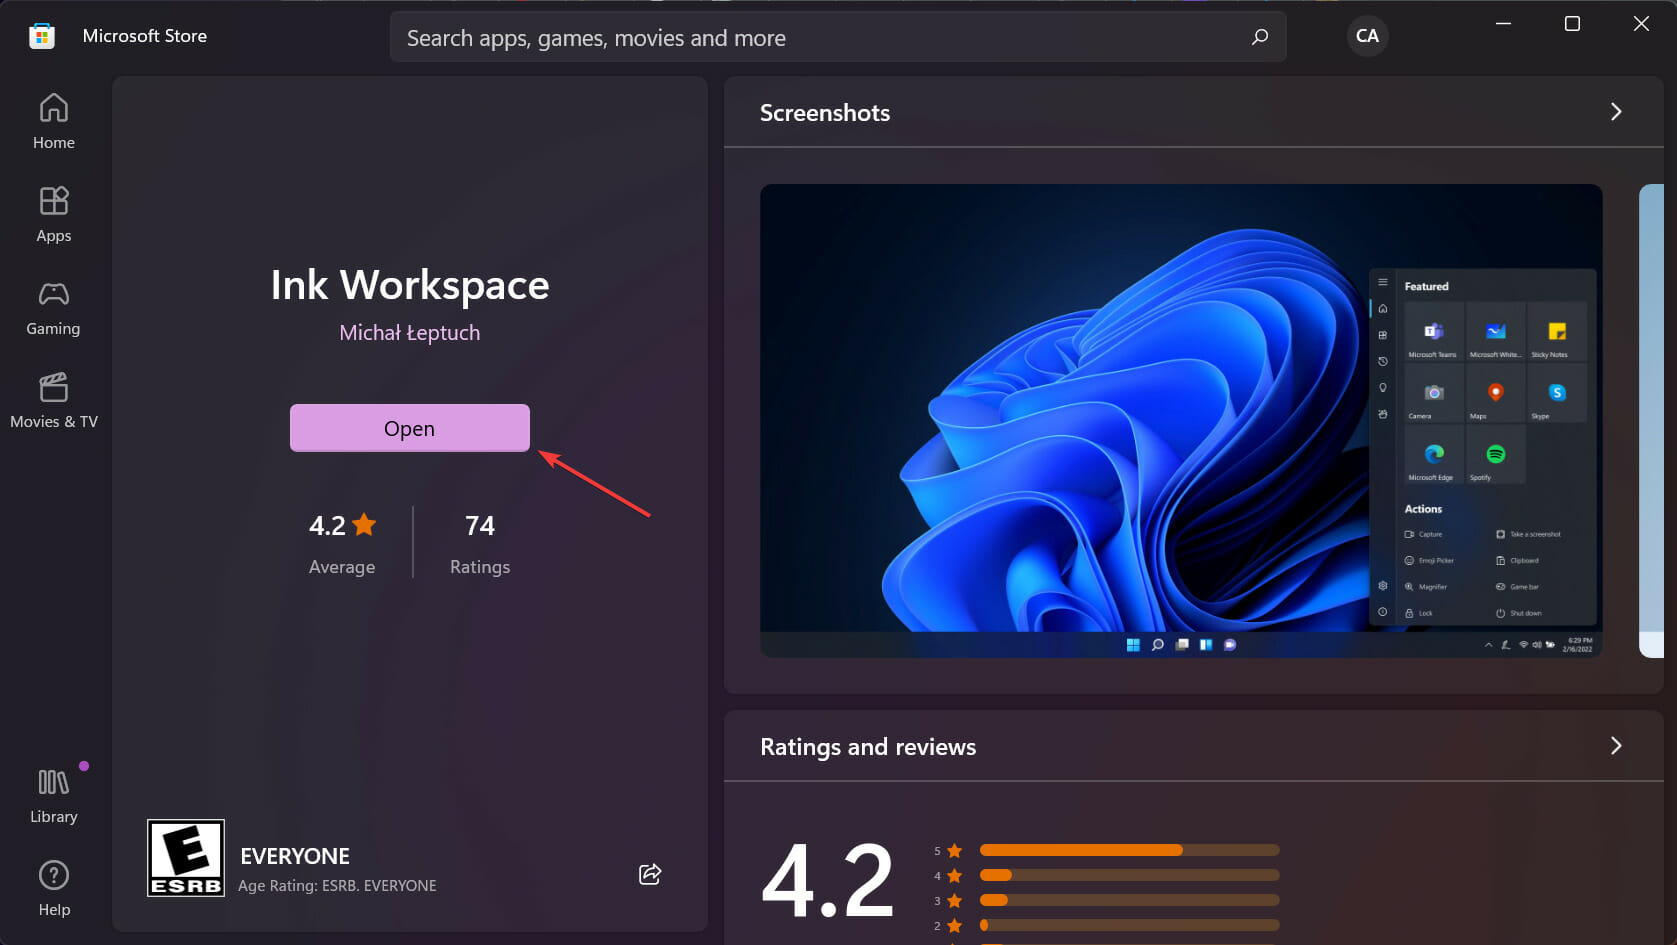
- Now you have a file ink workspace The app is installed and working.
How do I find missing ink workspace in Windows 11?
1. Enable Ink Workspace on the taskbar
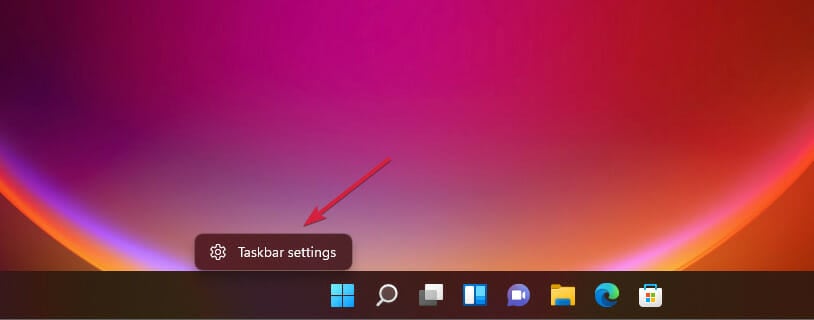
- Right-click on an empty area in a file Taskbar and click Taskbar settings.
- Search Pen List and set it to employment.
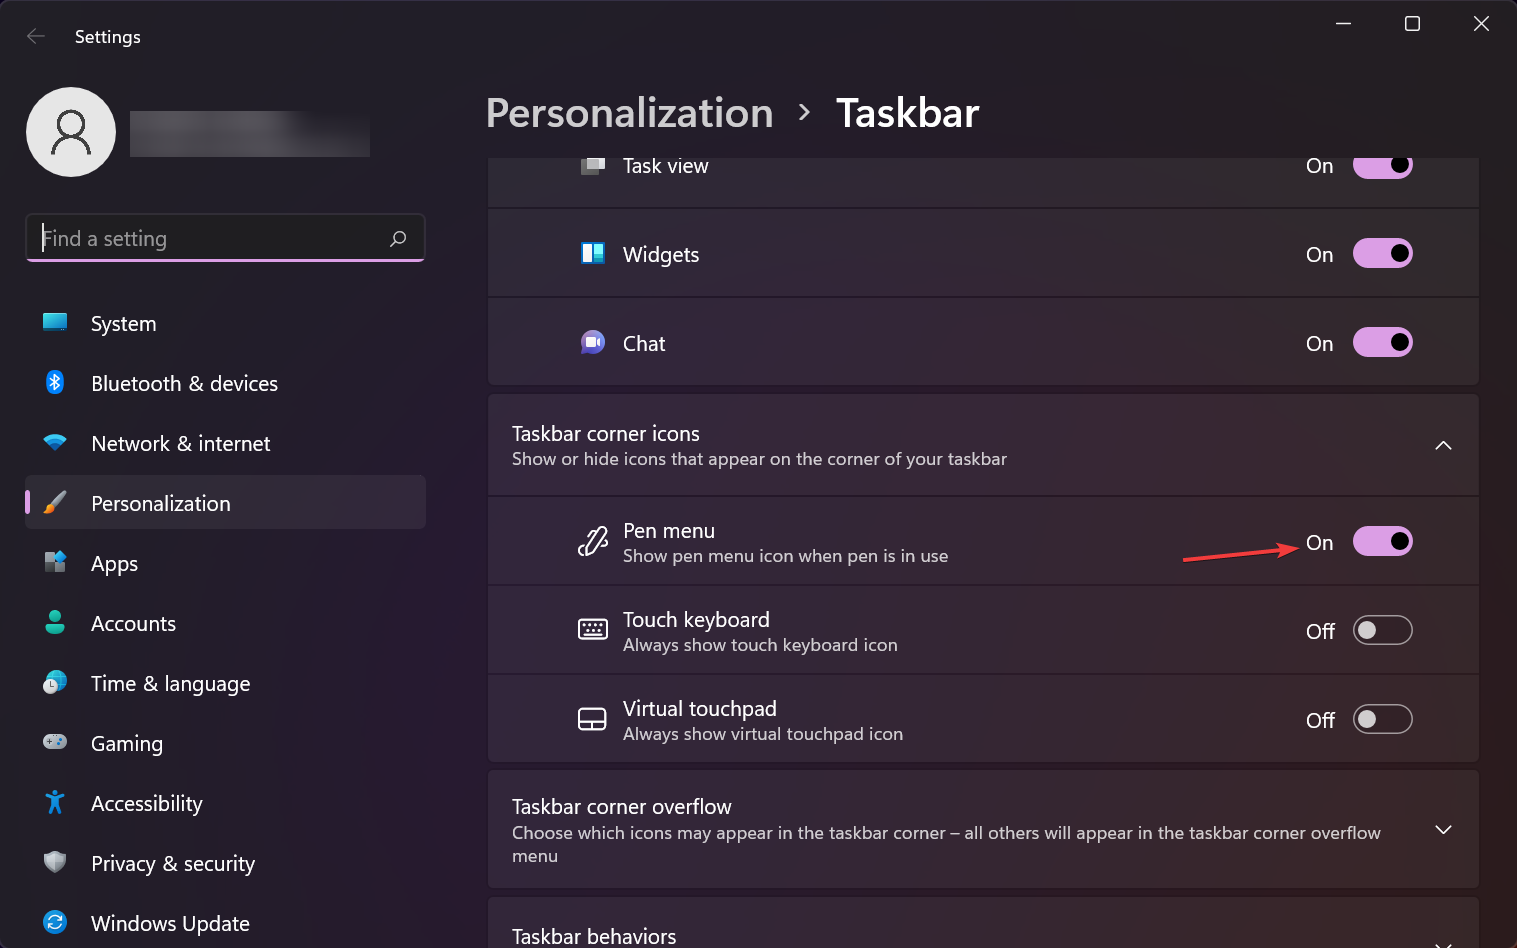
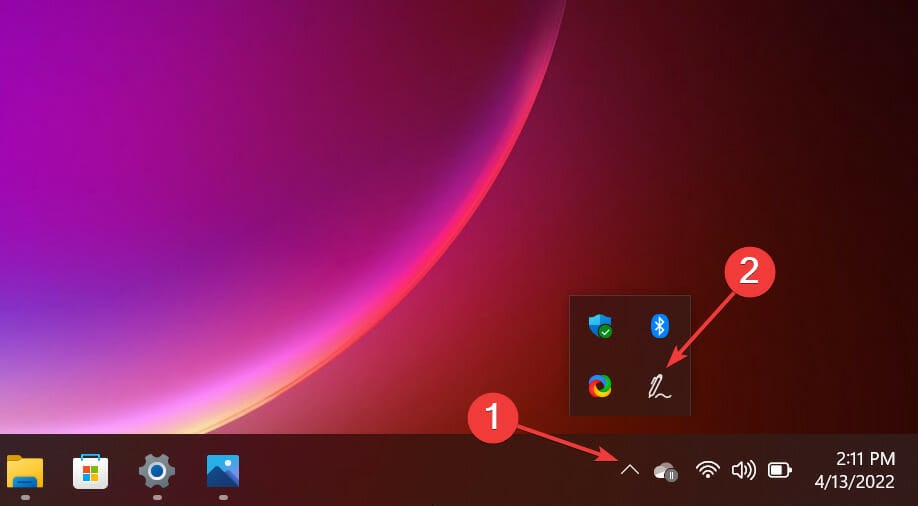
- The pen icon will appear with a squiggly line in the right corner of the taskbar.
2. Enable or disable the ink workspace from the registry
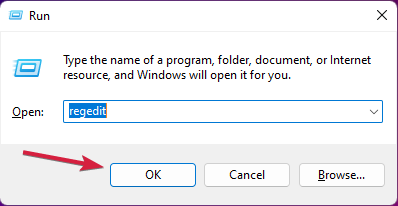
- press Wins + s And type regeditthen press Enters.
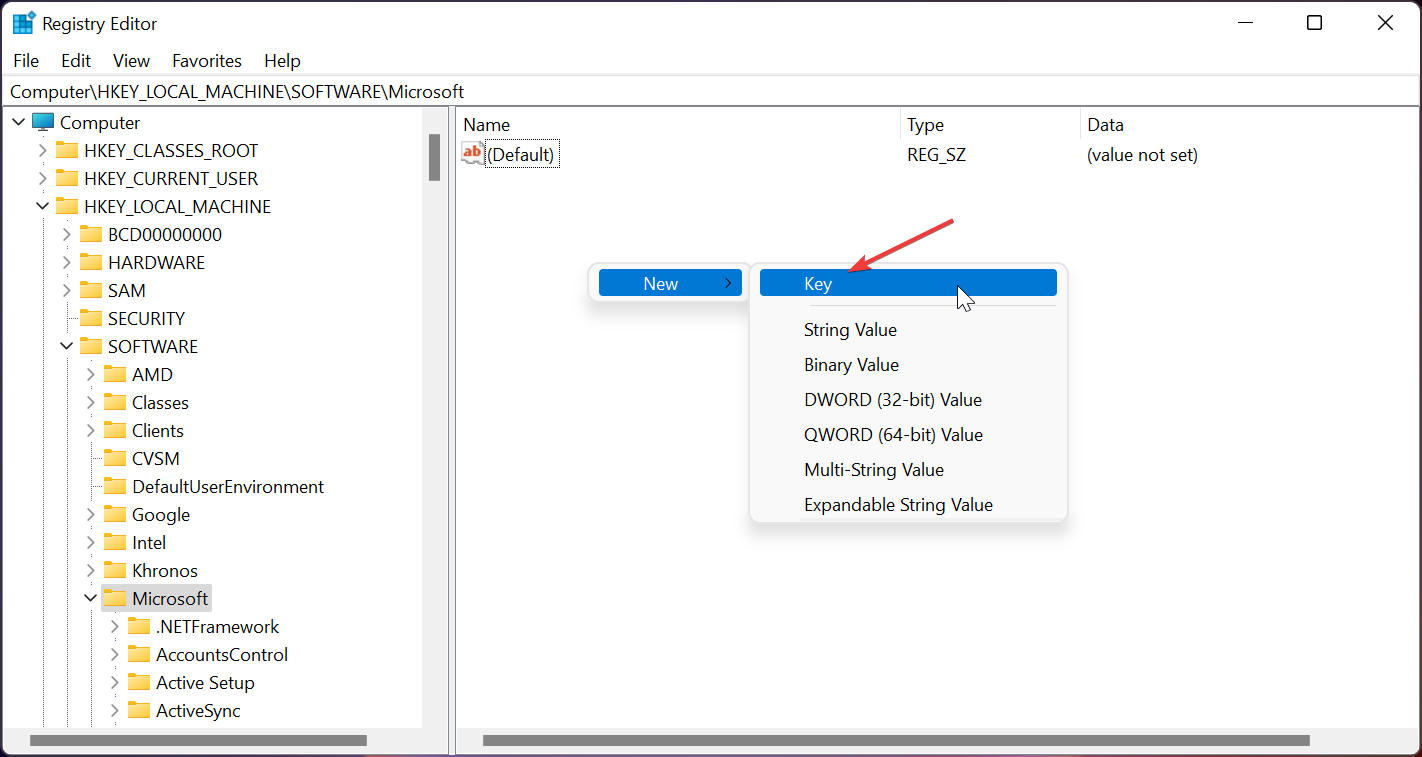
- Go to the following path:
Computer\HKEY_LOCAL_MACHINE\SOFTWARE\Microsoft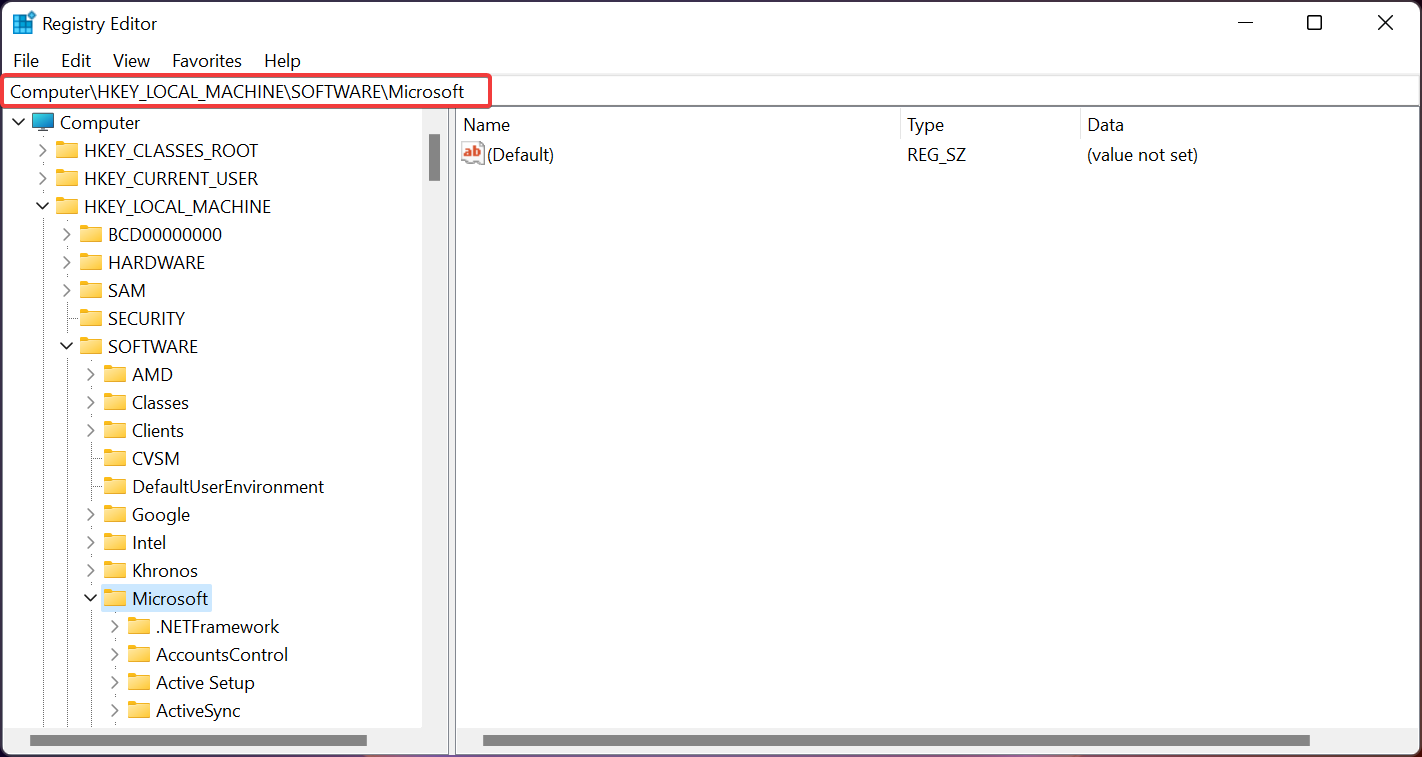
- Right-click on an empty space in the left pane, and select new From the popup menu, then a key, and set the key name to WindowsInkWorkspace.
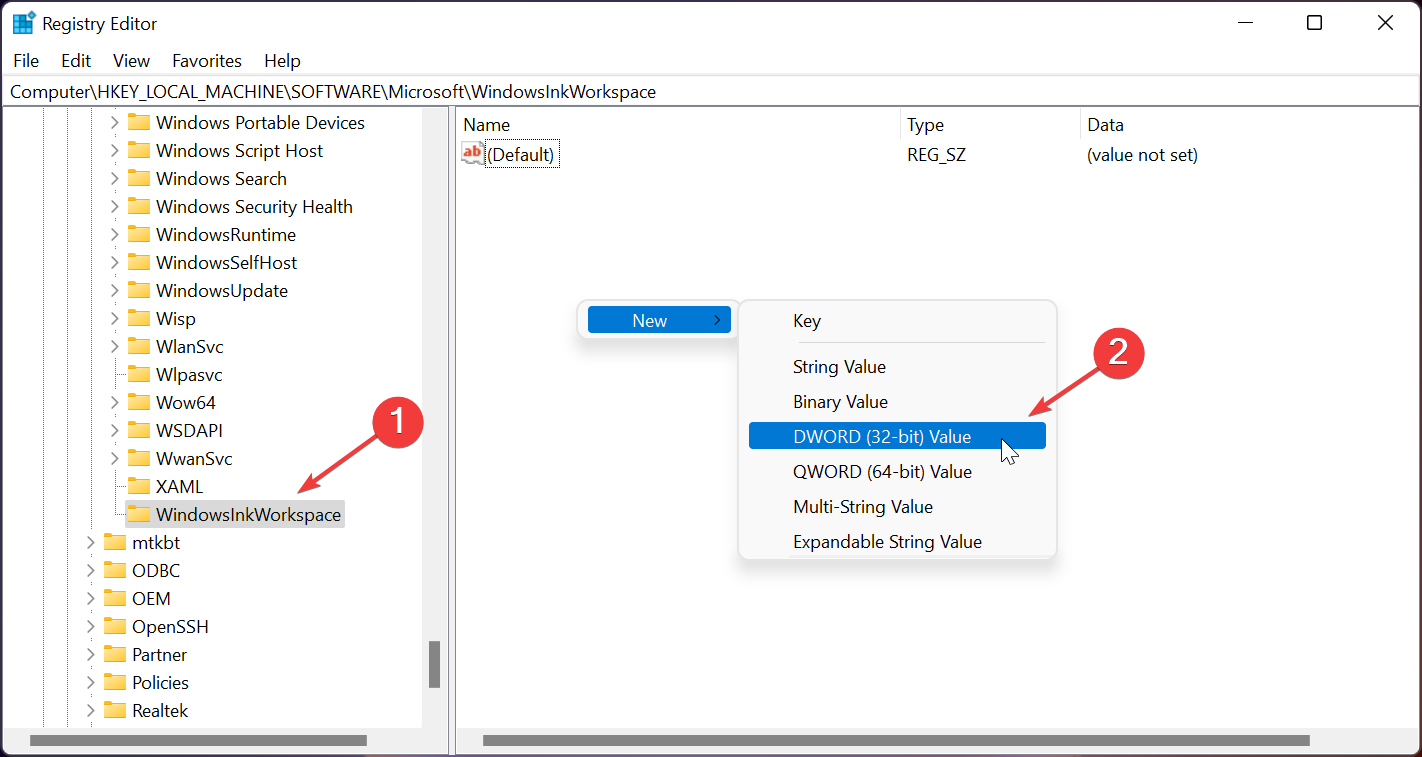
- Click the new key, then right-click an empty area in the left pane and select newThen DWORD value (32-bit).
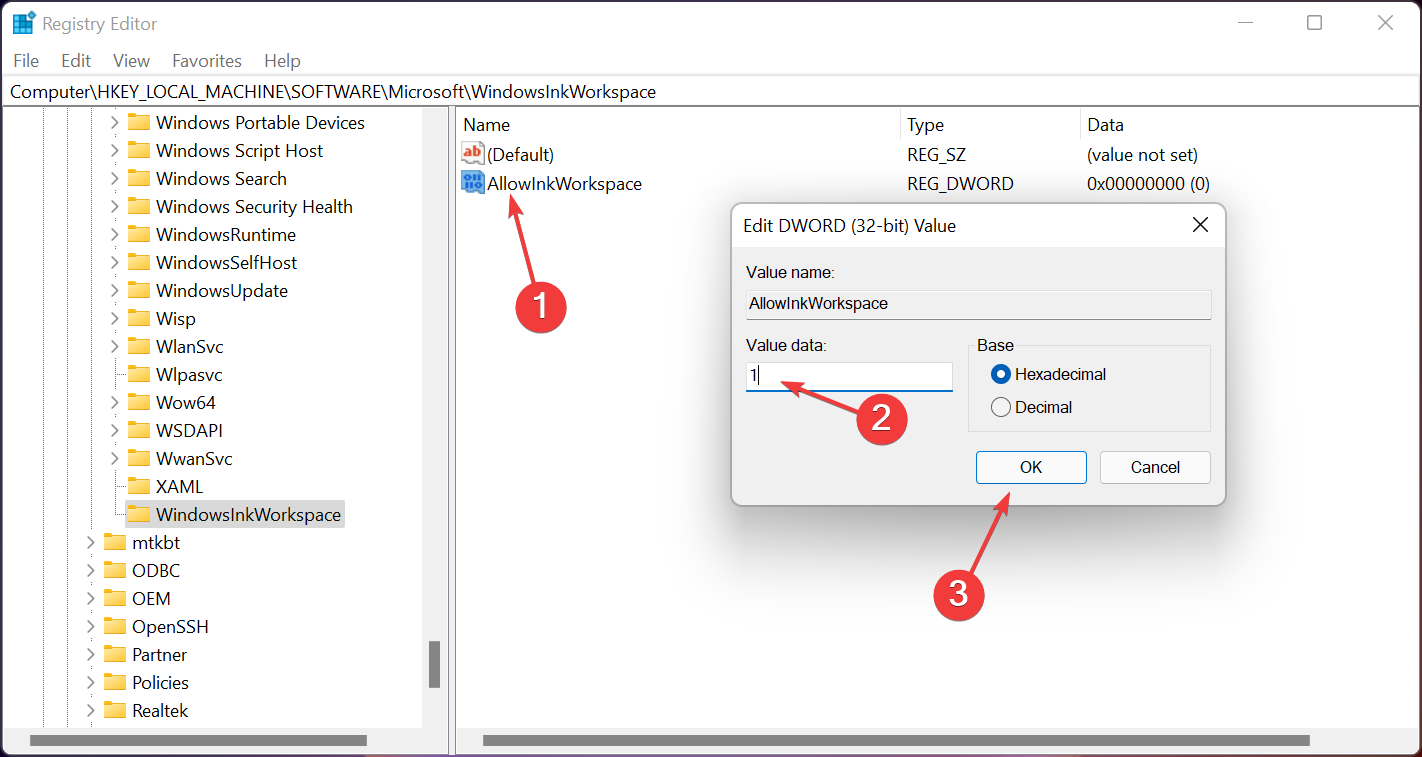
- Under the name tab, type AllowInkWorkspace. Double click on it and change its value to 0 to disable the 1 to enable it permanently.
Following this procedure will either permanently disable Windows Ink Workspace.
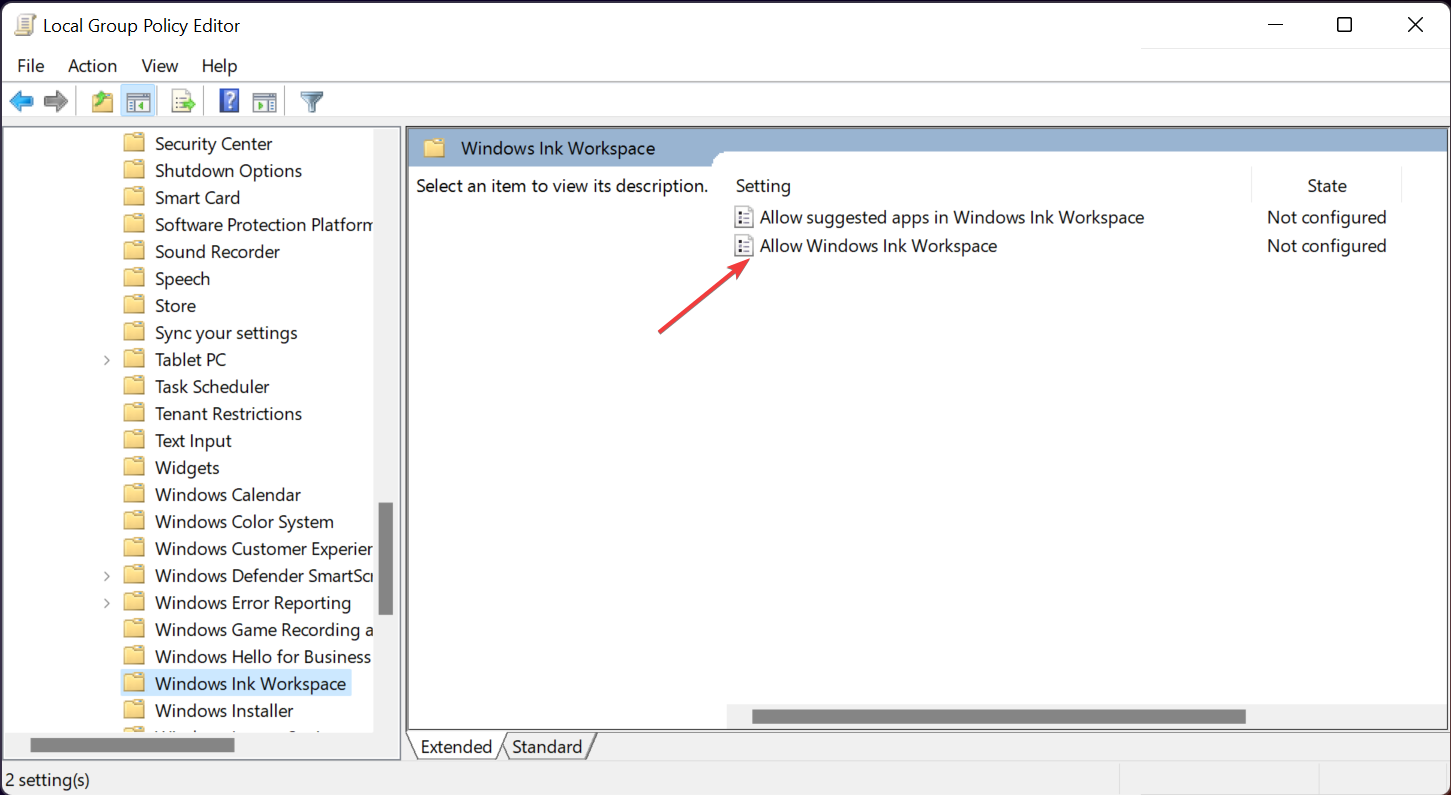
3. Disable or enable Ink Workspace with Local Group Policy Editor
- press Wins + s to open a file He runs square and type gpedit.msc command, then press Enters.

- Go to the following path:
Computer Configuration\Administrative Templates\Windows Components\Windows Ink Workspace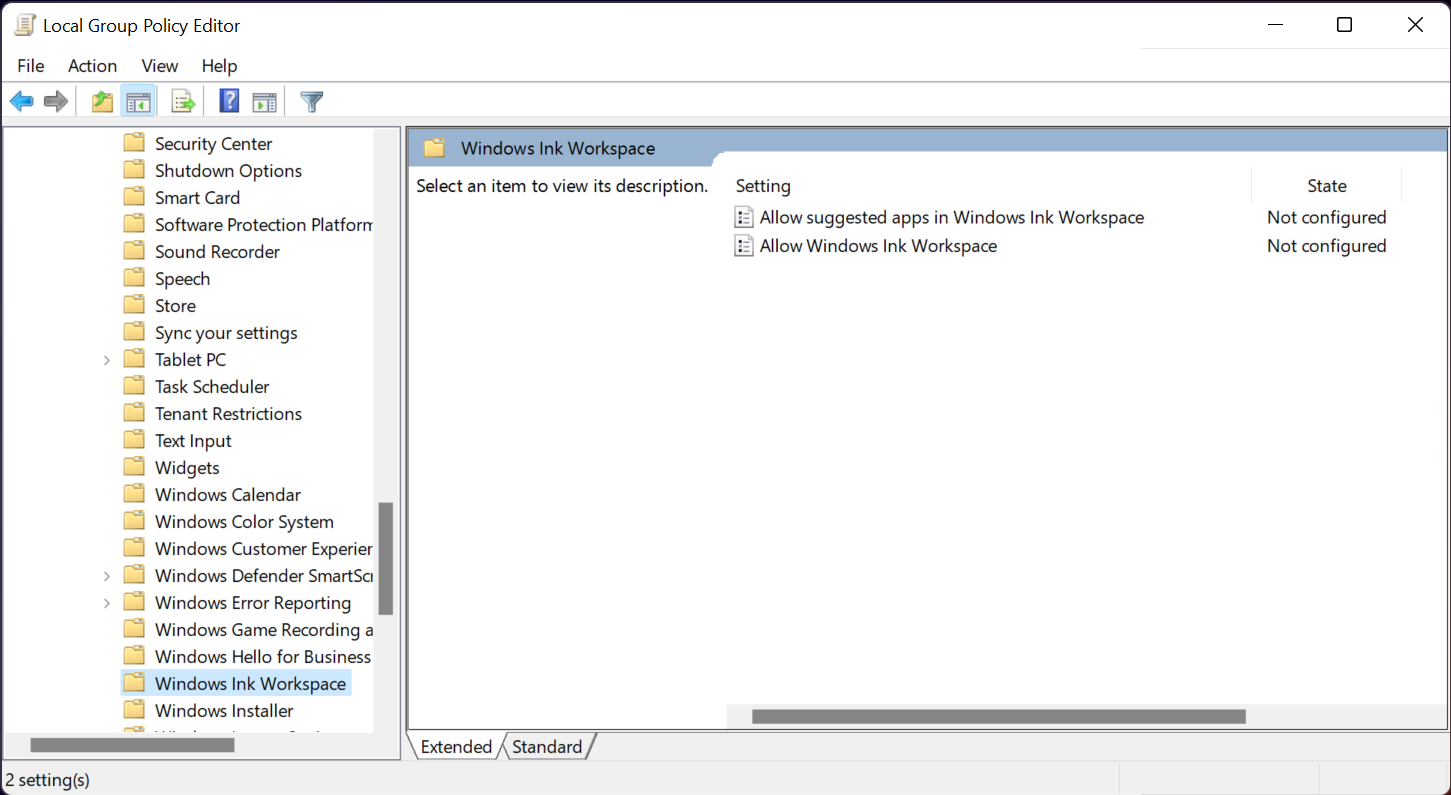
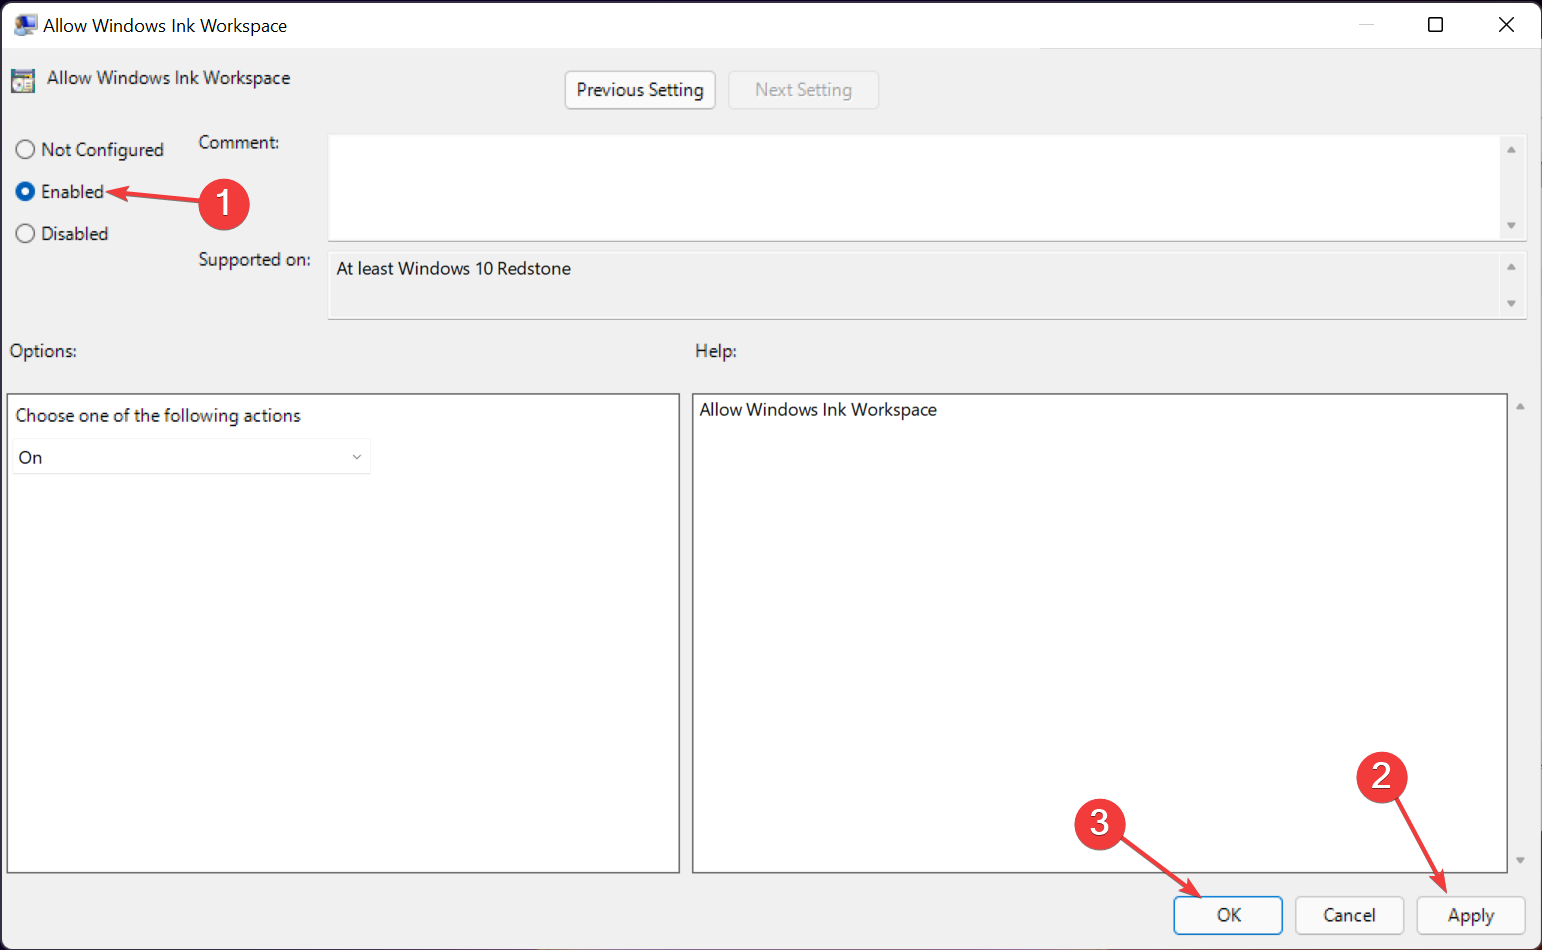
- In the right window, double-click Allow Windows Ink Workspace.
- Select either file Maybe or handicapped options, then tap Progressing, and then yes.
If your computer is a member of a local group, you permanently use the Local Group Policy Editor to enable or disable the Windows 11 Ink workspace.
How to install Windows Ink applications in Windows 11?
There are limited default applications in the Windows Ink workspace. You can install additional applications to expand the capabilities of the workspace. Programs like:
- Adobe Photoshop Element 2022
- PDF drawing
- Paint 3D
- Microsoft Magazine
Follow these steps to install another app besides the default apps in Ink Workspace.
- Click the Windows Ink Workspace icon on the taskbar.
- Choose Get more pen apps under the proposed area. Alternatively, you can launch the Microsoft Store app.
- Browse through applications that through the pen.
- Select the application and install it.
Check out our detailed list of features Microsoft removed from Windows 11.
Which of the above solutions helped you solve the problem of Windows 11 Ink workspace missing from taskbar? Let us know in the comments section below.

Thank you!
start a conversation
Comments
Post a Comment